
How Rigid Boxes Are Made: The 8 Stages from Board to Finished Box
Ektta Jain
Founder, RoboSouls •
Executive Summary
A rigid box is built, not folded. Greyboard is cut to size, the corners are formed and taped or stayed into a permanent shell, a printed wrap sheet is produced separately on an offset press, and that wrap is glued around the shell with the excess turned in over the edges. Inserts are fitted last. Because the shell and the wrap are made separately and then married, rigid box quality is decided at the wrapping stage more than anywhere else — that is where corner alignment, bubbling and pattern registration are won or lost.
Key takeaways
- A rigid box does not collapse. It ships assembled, which is why it costs more to store and freight than a folding carton.
- The shell and the printed wrap are made on completely separate paths and joined near the end.
- Corner forming determines squareness. A shell that is out of square cannot be rescued by good wrapping.
- The turn-in — wrap folded over the board edge into the interior — is the detail that separates a premium box from a cheap one.
- Rigid box production involves substantially more hand work than carton production, which is what drives its unit economics.
1. Why Rigid Boxes Are a Different Product
Key Takeaway
A folding carton is die-cut from one sheet and folded. A rigid box is assembled from thick greyboard into a permanent shell and then wrapped in a separately printed sheet.
The distinction is structural and it drives everything downstream. A folding carton is a single piece of paperboard, printed, die-cut, creased and glued, that ships flat and is erected at the point of packing. A rigid box — also called a set-up box — is built from greyboard far too thick to fold, formed into a fixed shape, and then covered. It arrives assembled and stays assembled. That permanence is what produces the substantial, weighty impression associated with luxury packaging, and it is also the source of every economic difference: rigid boxes take more material, more labour, more storage space and more freight volume per unit than an equivalent carton.
2. Stage One: Board Selection
Production starts with the greyboard that will form the shell. Greyboard is a dense recycled-fibre board specified in millimetres of thickness rather than GSM, and the thickness chosen is a structural decision. A small box holding something light needs less than a large box that will carry weight or span a wide unsupported lid. Under-specifying here produces a box that bows in the middle or whose lid sags; over-specifying adds cost and weight without adding perceived quality. The board is also assessed for flatness and moisture content, because board that has absorbed humidity will warp after wrapping as it dries, and that warp appears days later when the boxes are already packed.
3. Stage Two: Cutting the Board
The board is cut into the flat components of the box — base, four walls, lid top, lid walls — either on a guillotine for straightforward rectangular work or on a die-cutting press where the design calls for shaped edges, windows or non-rectangular geometry. Accuracy at this stage propagates through everything after it. A wall cut a millimetre long forces the corner to sit open or the adjacent wall to bow, and neither can be corrected later. Where a box has a window, a magnet recess or a ribbon slot, those features are cut now, before assembly, because cutting into an assembled shell is far harder to do cleanly.
4. Stage Three: Corner Forming and Staying
Key Takeaway
The cut walls are brought up and joined at the corners with tape or metal stays. This stage sets the squareness of the box, and squareness cannot be corrected afterwards.
The flat board components are folded up into their three-dimensional form and fixed at the corners. Traditionally this is done with corner stays — small metal staples — or, more commonly now, with kraft tape applied over the corner joint. Either way, the operation is what turns flat pieces into a rigid shell. It is also the point at which the box either becomes square or does not. A shell assembled slightly out of square will show it at every subsequent stage: the wrap will not sit evenly, the lid will not seat properly, and the finished box will rock on a flat surface. Because the wrap is applied over the corner joint, the joint itself is invisible in the finished product, which sometimes leads buyers to assume it does not matter. It matters more than almost anything else.
5. Stage Four: Printing the Wrap Sheet
In parallel with shell assembly, the outer wrap is printed. This is a separate print job in every meaningful sense: a sheet of art paper, typically in the 120 to 170 GSM range so it will turn a corner without cracking, printed on an offset press and then finished. Weight matters here in both directions — too light and the greyboard texture telegraphs through the surface, too heavy and the paper resists wrapping around the corner and creases visibly. Finishing is applied to the wrap sheet at this stage, before it goes anywhere near the shell: lamination first, then any spot UV, foil stamping or embossing. Offset printing is in-house at our Naraina facility, to a maximum sheet of 28 x 40 inches, and that sheet size determines how many wraps can be imposed together, which is a real factor in the economics of a run.
6. Stage Five: Wrapping
Key Takeaway
Adhesive is applied, the printed wrap is positioned over the shell and worked down across every face. This is where most visible defects originate.
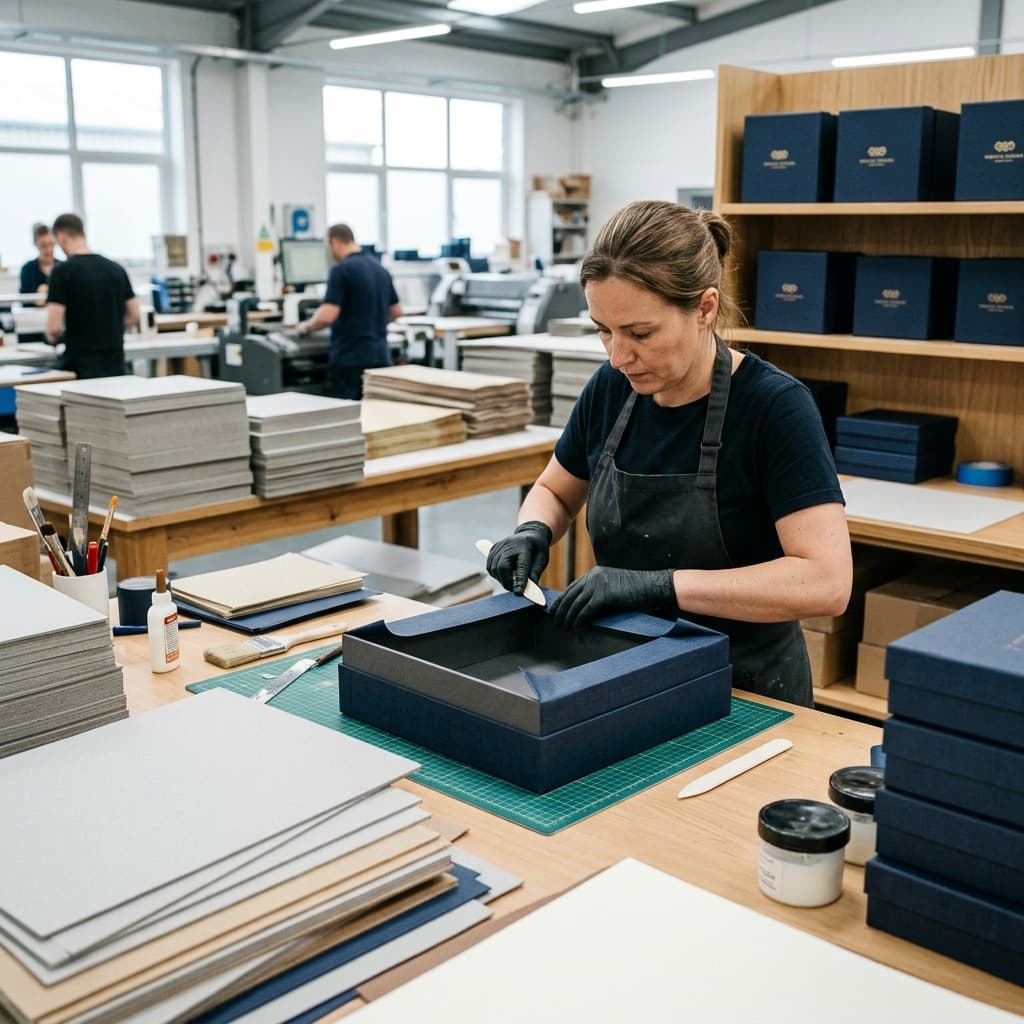
The wrap sheet is glued and married to the shell. Positioning must be accurate to within a very small tolerance, because on a patterned or logo-bearing wrap any drift is immediately visible against the box edges. The sheet is then worked down across each face to expel trapped air — bubbles that survive this stage will still be there in a year, and they are the single most common complaint about poorly made rigid boxes. Adhesive coverage has to be even: too little and the wrap lifts at the corners over time, too much and it bleeds through a light-coloured sheet as a visible stain. Where the design carries a pattern that must align across the corner from one face to the next, this stage requires markedly more care and a slower run.
7. Stage Six: Turn-In and Interior
The wrap is cut larger than the shell so that a margin of it folds over the top edge of each wall and down into the interior. This is the turn-in, and it is the detail that most reliably separates a premium box from a budget one. A clean turn-in means the visible top edge of the box is covered paper rather than raw greyboard, and it means the first few millimetres of the interior are finished. Corners are the difficult part: the excess paper has to be cut and folded so the corner is covered without bunching. Boxes that show grey board along the rim, or a lumpy corner inside, have been rushed here. Where the interior is to be lined in a different paper, that lining goes in after the turn-in, covering its inner edge.
8. Stage Seven: Magnets, Ribbons and Inserts
Functional components are fitted once the shell is wrapped. Magnets sit in recesses cut into the board before wrapping, so the wrap sheet passes over them and they remain completely invisible from outside while still closing with a firm snap; grade and count are selected against lid weight and the span the lid has to cross, rather than by a fixed rule. Ribbon pulls are seated through slots cut at the cutting stage. Inserts — the fitted platform that holds the product — are produced separately, in board, foam or moulded pulp depending on what is being held, and dropped in at the end. An insert is worth as much design attention as the box: it controls how the product is presented at the moment of opening, and it is what stops the contents moving in transit.
- Magnet recesses are cut before wrapping so the magnets stay hidden under the wrap sheet.
- Ribbon slots are cut at the board stage, not punched through a finished box.
- Inserts are made separately and fitted last, in board, foam or moulded pulp.
- The insert determines the reveal, so it deserves the same design attention as the exterior.
9. Stage Eight: Quality Control and Packing
Finished boxes are checked for squareness, lid fit, wrap alignment, bubbling, corner finish and colour consistency across the run. Because rigid boxes cannot be flat-packed, they are then nested where the design allows and packed into outer cartons for transit, and this is a genuine constraint rather than an afterthought: assembled boxes consume a great deal of volume, so freight and storage both cost more than the equivalent quantity of flat cartons. Delivery is pan India. If the boxes will be stored for any length of time before use, storage conditions matter — greyboard is hygroscopic, and boxes stored somewhere damp will warp regardless of how well they were made.
10. Where Rigid Box Projects Usually Go Wrong
Across the stages above, a small number of failures account for most of the problems buyers actually experience. Almost all of them are decided before production starts, at the specification stage, which is why the brief matters more than any single production step.
| Symptom | Stage it originates | Prevented by |
|---|---|---|
| Box rocks or lid does not seat | Corner forming | Accurate cutting and squaring of the shell |
| Bubbles under the wrap | Wrapping | Even adhesive and proper working-down of the sheet |
| Cracked wrap at corners | Wrap specification | Wrap sheet in an appropriate GSM range |
| Grey board visible at the rim | Turn-in | Adequate wrap margin and careful corner folding |
| Lid sags across the span | Board selection | Board thickness matched to span and lid weight |
| Boxes warp after delivery | Board moisture or storage | Controlled storage conditions before and after |
| Product moves inside | Insert design | Insert designed to the product, not the box |
Summary Overview
Rigid box manufacturing is two production lines that meet near the end: a structural one building the shell, and a print one producing the wrap. Understanding that explains most of what buyers find puzzling — why the corner joint matters even though it is invisible, why wrap paper weight is a structural decision rather than an aesthetic one, and why the turn-in is the detail worth inspecting first when you are assessing a sample.
Frequently asked questions
How are rigid boxes manufactured?
Greyboard is cut into flat components, formed up and joined at the corners into a permanent shell. Separately, a wrap sheet is printed on an offset press and finished. The wrap is then glued around the shell, with the excess turned in over the top edges into the interior. Magnets, ribbons and inserts are fitted last.
What is the difference between a rigid box and a folding carton?
A folding carton is die-cut from a single sheet of paperboard and ships flat, to be erected at packing. A rigid box is assembled from thick greyboard into a permanent shell that never collapses, then wrapped in a separately printed sheet. The rigid box costs more in material, labour, storage and freight.
What is greyboard and how is it specified?
Greyboard is a dense recycled-fibre board used as the structural core of rigid boxes. Unlike paper it is specified in millimetres of thickness rather than GSM. Thickness is chosen against the size of the box, the weight it carries and the unsupported span of the lid.
Why do some rigid boxes have bubbles under the surface?
Air trapped between the wrap sheet and the greyboard shell during wrapping, usually from uneven adhesive or from the sheet not being worked down properly across each face. Bubbles that survive production do not disappear afterwards, which is why the wrapping stage is where rigid box quality is largely decided.
How are magnets hidden inside a magnetic closure box?
Recesses are cut into the greyboard before the box is wrapped, and the magnets are seated into them. The printed wrap sheet then passes over the top, so the magnets are completely invisible from the outside while still producing a firm closure.
Why are rigid boxes more expensive than cartons?
More material, considerably more hand labour, and no flat-packing. A rigid box is assembled in the factory and ships assembled, so it occupies far more volume in storage and transit than the same quantity of folding cartons, which ship flat and are erected at the point of packing.
Technical Consultation
Need specific specifications for your project?
Send us the format, quantity and finish you are considering, and we will come back with a specification and a quote. Production runs to a 72 hour turnaround.